Getting the Shot
Four experts walk skiers and riders through getting the best video out of their days at the terrain park
Written by Kyle Magin
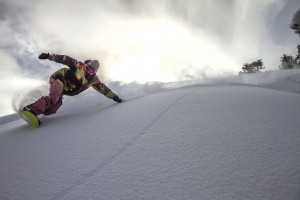
A downhill resort’s terrain parks are bastions of creativity. From immensely talented skiers pushing the limits of their sport to newbies getting a handle on their own skill sets, skiers and riders are putting their own touches on big air and technical tricks.
Look at any Tahoe terrain park and, aside from the Skittles-colored clothing and eye-popping skills, one thing will jump out at you: the preponderance of video cameras. From helmet- and pole-mounted point-of-view (POV) rigs to handheld setups, tripod-mounted devices and iPhones, cataloging a day at the park via video is as ubiquitous as oversized shirts and nascent mustaches. With so many aspiring filmmakers putting together park edits, we decided to talk to a few experts about how to get the best shots in the park.
Tahoe Quarterly interviewed a foursome of pro videographers in the Tahoe area to discover the secrets to shooting and polishing outstanding park edits. Cory Anderson is a video specialist for Reno’s OrangeTree Productions with credits to his name including shots for Mammoth Mountain. Chris Bartkowski is a videographer for Northstar California, who puts together an array of videos for the resort’s online outlets. Anthony Cupaiuolo is a South Lake Tahoe–based videographer and owner of First Tracks Productions, which shot Nike’s Chosen Tour at Heavenly Resort; his work has also been featured on Outside Television. TQ contributing photographer Justin Majeczky has completed video projects for the likes of the Hyatt Regency Lake Tahoe and owns Varient3 Productions, a media productions firm. All four have extensive park shooting experience. We asked them a number of questions to help guide you to better park shooting, whether you’re making an edit to share with your friends and family or are looking to wow sponsors for a skier or rider.
Tahoe Quarterly: What makes a good park edit?
All: A variety of shots.
Cory Anderson: The key nowadays is to be original and creative—but keep it in the realm of interest. It’s one thing to be creative and shoot some really random stuff to put in your edit, but sometimes it’s like ‘what happened to the essence of snowboarding?’
Chris Bartkowski: A good variety of shots is going to increase the interest level of your video. Take all sorts of shots—follow cams, panning shots, keep the flow and the pace of the video going, keep the viewer interested. (Check out an edit from Chris back on Northstar California’s opening day here.)
Anthony Cupaiuolo: For me, it’s a diversity of angles, if possible. You don’t want to see everything from the same POV perspective the whole time; you want to see a mix of things, some wide shots, a follow-cam. (Check out Anthony’s edit of snowboarder Alexis Roland’s 2013 season here.)
Justin Majeczky: Ride with friends and have a good time. Film everything. Getting on the lift, warming up, the silly things you do with your buddies. All these things help make an overall video—you want to show that you had fun.
TQ: When is it appropriate to use POV footage?
AC: I like the helmet cam perspective on a big feature, where you can see your hand reaching down and grabbing the board. A chute is also a great place for a helmet camera, where you can see how steep it is.
CA: You want to see it when you’re hitting bigger features. You want to use it on something that’s going to scare the viewer a little bit because they’re so close to the action.
TQ: Where do you position yourself near a jump feature to get the best shot?
CB: As far as jumps go, the four corners of the feature provide the best angle. But all features and jumps are different; maybe take a close look ahead of time and see where the light is coming from, see where your shadow falls and try to get that out of the shot.
JM: Best place to stand when shooting with a GoPro or any wide-angle lens camera is right on the knuckle (the area in front of the landing zone on a jump). It helps show the full size of the jump. Follow your friend as they hit the kicker and slowly stop your shot as they land and let them ride out of frame.
TQ: What don’t you want to see in an edit?
AC: When it comes to the edit, if you don’t have a big bag of tricks, shorter is better. If you have one good trick—a frontside 540—I don’t want to see that in your edit more than once. If you’re trying to get sponsored, team managers don’t want to see you taking a hard bail (wipeout) unless you take it while learning a trick and come right back to show you stomping that same trick. That’s cool because you’re showing you’re progressing.
CA: The market is flooded with (POV) shots. Step back and use a long lens here and there. How many edits do you see that are just fisheye, fisheye, fisheye? With action sports, you’ve got the challenge of getting the gear up there, and obviously it’s convenient to use a (POV camera), but take the time to actually bring a tripod with you and spend all day on a feature.
TQ: How much do you want to see general lifestyle in a park edit—video of people arriving at a resort, landscape shots and more that is not actual skiing and riding?
CB: Lifestyle is super important in showing the personality of your skiers or riders. Especially if you’re getting permission to shoot or getting tickets or getting compensated in some way, capturing a proper and appropriate scene of where you’re riding is important.
JM: Use all the footage you got from the day. You basically want to show in two and a half minutes how much fun your day with your homies was. It’s about recreating the atmosphere of that particular day. If your edit is fun, people will watch it.
TQ: When it comes to video editing, what tips or tricks do you have to share?
CA: Keep it simple. Everybody tries to add cool graphics, and since most people are just learning as they’re going they try to add too much. Simple fades, a clean font and a lot of time shooting will make a good edit.
AC: Music is important to get someone’s attention, something with a distinct beat, and you want things to happen on a beat—for someone to land on a beat or take off on one. My ideal song is an older school hip-hop song… it’s cool to have an old-school flow in it.
CB: Capture as much as you possibly can while you’re out there. You can always go back and delete, you can’t go back and shoot more.
JM: Park shoots are all about fun. Use some upbeat, fun music like something from the ’80s. Make the edit no longer than two and-a-half minutes. No one has the patience to watch a five-minute park edit these days.
TQ: Tell us about a favorite shot of yours.
CA: On a large jump, I like to step way back and put a 200mm lens on so that you’re zoomed in really tight on the skier or rider. That way you can see how fast they’re going and get a feel for how big the jump is.
AC: Place a POV camera on a pole pointed back at yourself. For really big features, if you have a skier or snowboarder with a pole-mounted camera, it brings the viewer into the action in a different way.
JM: I usually get low and right up in (the rider’s) grill (on a rail or box feature) when shooting with a (POV) camera. The wide lens exaggerates depth and perception so the lower and closer you get, the more dynamic of a shot you will get. I usually set up in the middle or the end of the rail/box. Film them riding up, sliding, and when they land stop the camera and let the rider go out of frame.
These are just a handful of tips you can use to expand your shooting tool bag. Happy filming.
Find more from the shooters who participated here:
Tahoe Quarterly Editor Kyle Magin has managed to film the corner of his thumb in a number of self-published productions at Tahoe-area ski resorts.


